

Contents
Createyour first workflow using the Workflow Builder. The workflow builder is a powerful, easy-to-use interface. It allows you to create, update and modify workflows- without any need for code or coding knowledge! With the Workflow Builder, you can:
Build custom forms and actions
Add automated events
Add statuses
Decided when and how your workflow moves status with the moving rules.
Follow the guide below to discover how to tailor your workflows to your business to complete tasks seamlessly.
Add custom statuses to track the progress of the task
You can add different statuses when building a Workflow. These statuses help outline each sub-process needed to complete the task and clearly show the task’s progress. E.g. in our Meeting Workflow, these statuses define the processes/sub-tasks that need to be carried out to complete a ‘Meeting’ task and show users’ the status of the task:
Arrange meeting
Awaiting meeting
In progress/Minutes
Actions In Progress
Actions followed up
Meeting Cancelled/Postponed
How to add a Status
Click the addAdd Statusbutton located towards the bottom left of the Workflow Builder page.
ANew Statusbox will appear. Click on the box to open the status settings. Here you can customise what will appear on the status page and how the status will behave.
In the status’s ‘Settings’ Tab, you can name the status and add an optional Information box to appear on the status page.
To add more statuses, click addAdd Status.

Add custom forms & actions for each status
With the SwiftCaseWorkflow Builder, you can customise your workflows with forms and actions. Using forms and actions in your workflows can drastically cut down on time spent collecting data from your colleagues or clients. Thanks to SwiftCase’s collaborative focus, users can go into the Task page and log all the necessary information themselves. Meaning you don’t have to request information from colleagues and clients to then log yourself.
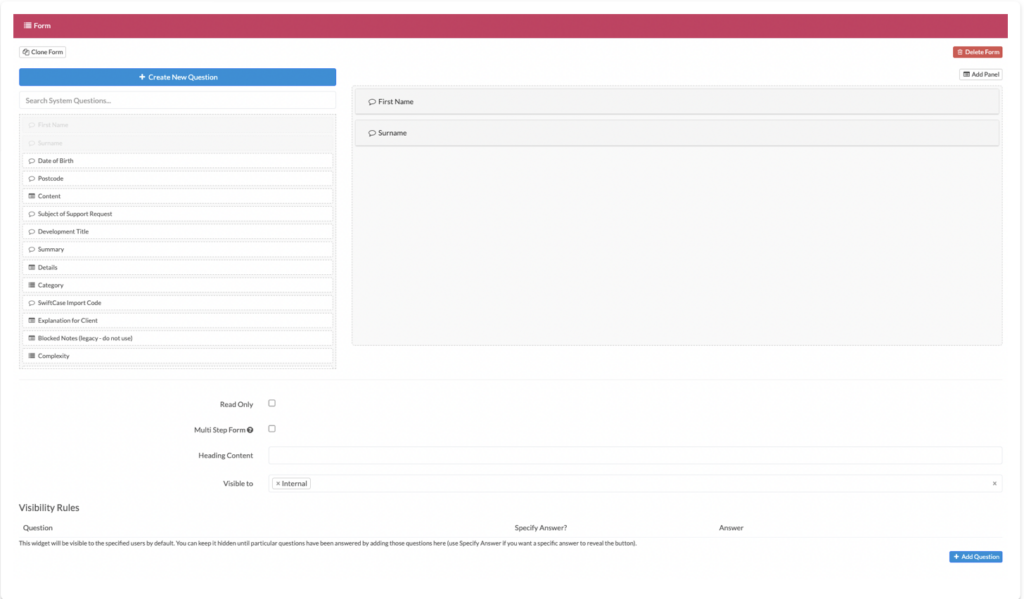
Forms
To add and set a form, click on the Forms & Actions tab. This will display a blank box with an Available Actions bar on the right-hand side.
Drag and drop a Form from the Available Actions into the blank box.
3 This will display a Form box. To the left of the Form box will be a sidebar with different Questions, which you can drag and drop into the blank Form space.
Tips:
You can add more than oneQuestioninto theForm.
Actions
To add and set up actions, click on the Forms & Actions tab. This will display a blank box with an Available Actions bar on the right-hand side.
Drag and drop any Action from the Available Actions into the blank box.
This will display the action in the blank space, where you can then decide how it displays and what it does.
Note:
To discover in more detail what the form & actions do,view our guides.
Decide how and when your workflow/task moves status
You can use the Moving Rules to customise how and when the Task moves status- these can beQuestions Answered,Buttons Clicked, andExpert Allocated.
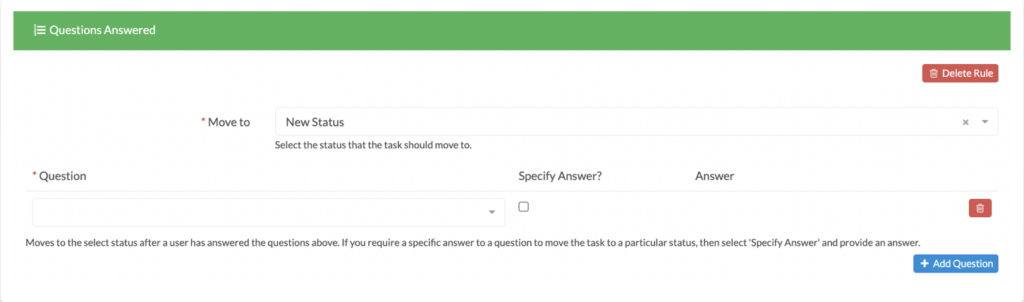
How to add Moving Rules
Click on the Moving Rules tab.
Drag and drop the moving rule you want to use from the left-hand side.
You can set up the moving rules to betime-sensitive, only trigger afterspecific answersor before/after aspecific status.
Add custom Automated Events to your Workflows
Make use of Automated Events to automate the small tasks that take up a lot of time, like sending an email or creating reminders.
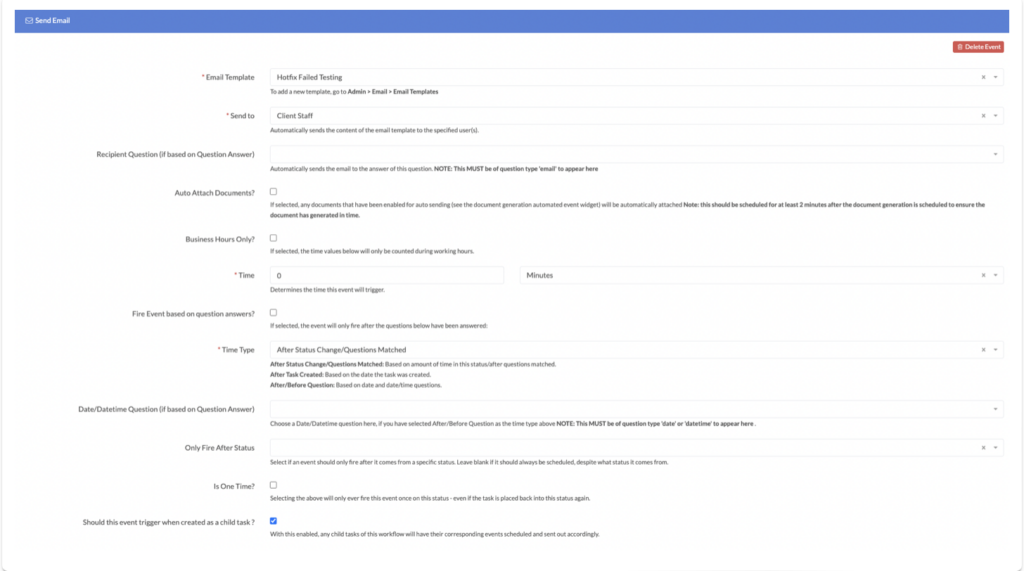
How to Add Automated Events
Click on the Automated Rules tab.
Drag and drop the automated event you want to use from the left-hand side.
You can set up the automated events to betime-sensitive, only trigger afterspecific answersor before/after aspecific status.
Note:
To discover in more detail what eachAutomated Eventdoes,view our guides.
Ensure SLA through Workflows
SwiftCase has a RAG system, as seen in the Workflow Builder. Red, amber and green signify tasks that have exceeded, are close to exceeding, or are on track. All jobs should start as green and, ideally, stay that way until completion, thereby meeting your Service Level Agreements internally and externally. E.g. a task could move from green to amber if you don’t resolve a customer request within 2 hours, then marked as red after 4 hours. You can then configure amber and red alerts to trigger messages to the various parties involved, depending on their level of urgency, to indicate that action is required.
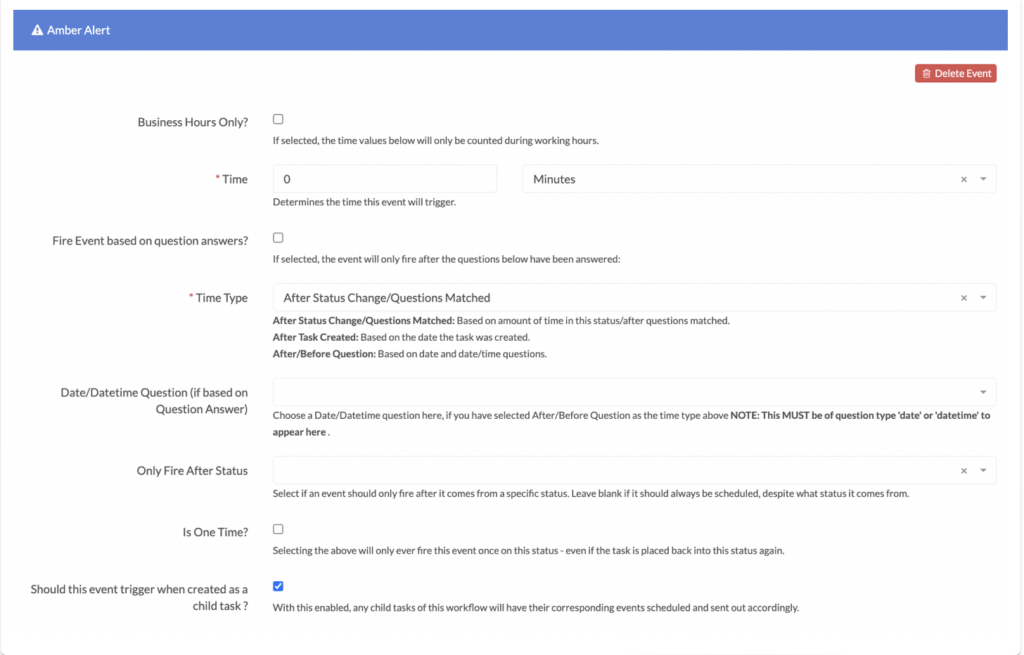
How to add RAG Flags
Click on the Automated Events tab.
Drag and drop either a Red Alert orAmber Alertautomated event from the left-hand side.
You can set up the RAG alerts to betime-sensitive, only trigger afterspecific answersorbefore/after a specific status.
Ready to automate your workflows?
SwiftCase helps operations teams streamline their processes with powerful workflow automation, case management, and AI-powered communication tools.