

TheMeetingWorkflow helps you organise and track your meetings all the way through, from booking the meeting to post-meeting follow-up actions.
Using the Meeting Workflow
- ClickTasksto navigate to the Dashboard, then click addCreate New Task.
- Choose a Client and Client Staffand click Create Task.
- Choose theMeetingWorkflow and click Add Task.
- Fill out the required fields and click Save. This will update the Task status to Arrange Meeting.
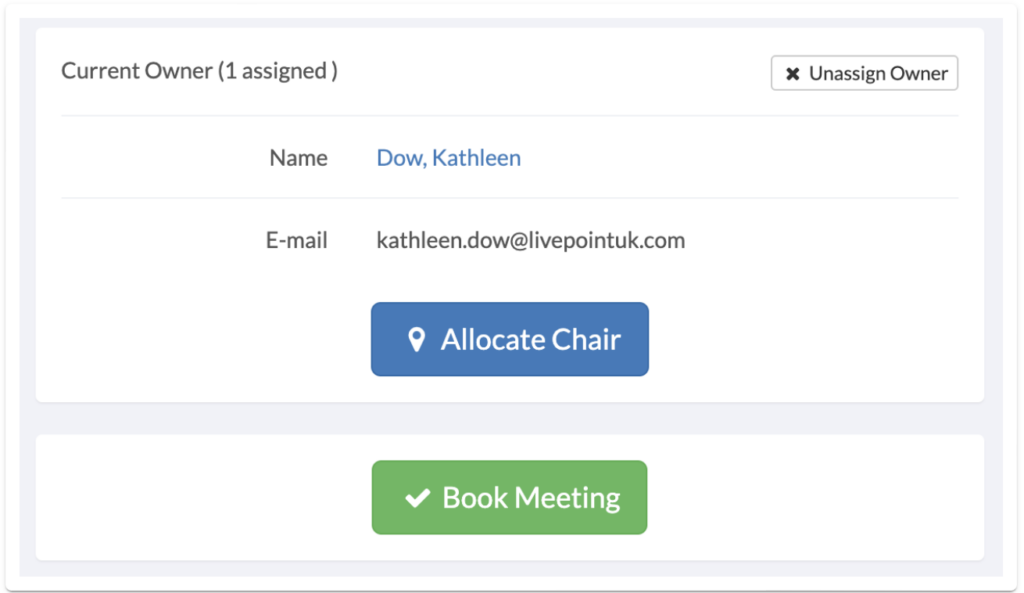
- Click the View Task button at the bottom right of the page. This will take you to the Task Page. Towards the bottom of the page, there is a blueAllocate Chairbutton; click this to assign a chair for the meeting. By default, the Task Owner will be assigned as the Chair.
- Below this button is a greenBook Meetingbutton; click this to update the Task status to Awaiting Meeting.
- Once this is completed and you are ready to begin the meeting, return to the same Task page and click the greenBegin Meetingbutton. This will update the Task status toIn Progress/Minutes.

- Once the meeting has been completed, return to the Task page, fill in the Follow-up Actions form, and click the blueAllocate Action Supervisorbutton to assign a User to manage the follow-up actions discussed. Then click the greenMeeting Completebutton. This will update the Task status to Actions In Progress.

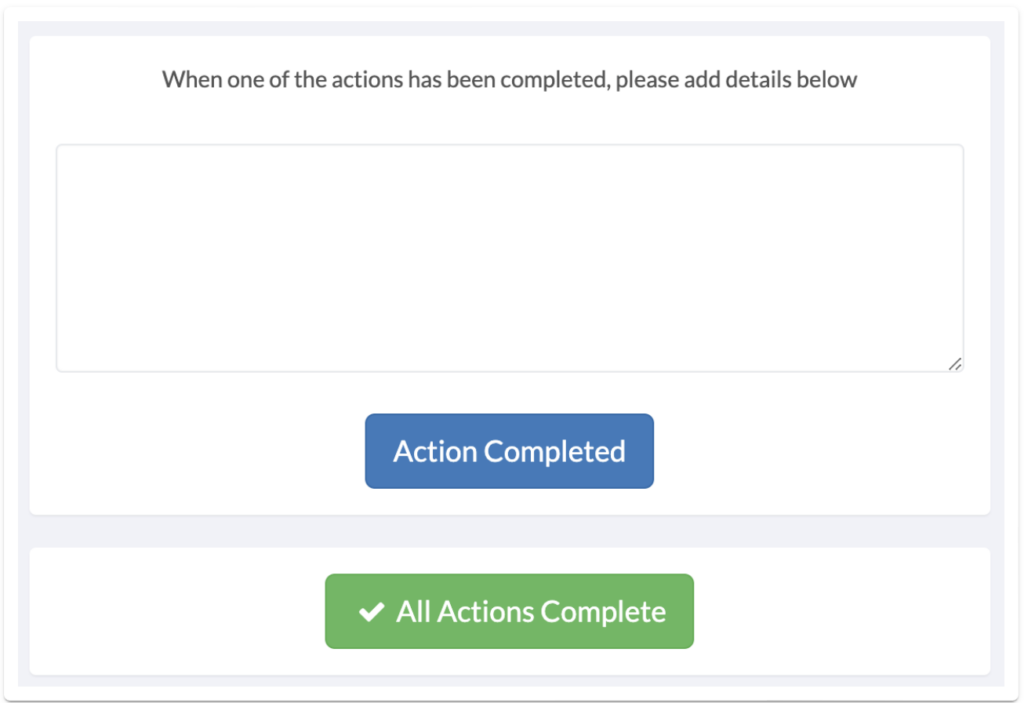
- After any follow-up actions have been completed following your meeting, go back to the Task page, provide details of the Actions completed in the box provided, and click on the blueAction Completedbutton. Click on the greenAll Actions Completebutton. This will update the Task status toActions Follow Up.
- Once the Action Supervisor has reviewed the actions, return to the Task page and click the greenActions Reviewed and Completebutton. This will update the Task status toCompleted.

Ready to automate your workflows?
SwiftCase helps operations teams streamline their processes with powerful workflow automation, case management, and AI-powered communication tools.